


3 Steps to Prepare DNS Changes for a Data Center Migration
3 Steps to Prepare DNS Changes for a Data Center Migration
Data center and cloud migrations often require changing IP addresses of your servers and application end points. These changes require careful planning and precise execution in order to minimize downtime. Typically, this is executed by manually searching your DNS server’s configuration for each server that is migrating.
After completing many customer migration projects, performing DNS assessments, and change automation and verification, this impact-assessment command in our dns-tools helps you prepare DNS changes for a server migration. Just follow these three steps:
- Assess your current zone data,
- Report on proposed changes, and
- Verify DNS resolves correctly after migration
1. Assess
The first step to a successful migration is to gauge what your impact is. Using dns-tools, you can perform an assessment of one or more IP addresses, a range of IPs or entire subnets. Here, we provide a simple CSV file with a list of ‘Old IPs’ and ‘New IPs’ for a data center migration:
dns-tools impact -db -if impacted_ips.csv
Note: Here we use the -db flag to use the default BIND installation directory, /etc/bind. You can also simply provide one or more zonefiles or an alternative BIND installation path.
2. Report
You can output this to your console as shown by default, or TSV if you want to work with this data in Excel, see the -o option. The output here is one line per impacted DNS resource record, showing the FQDN, old IP and the zone file where the entry is.
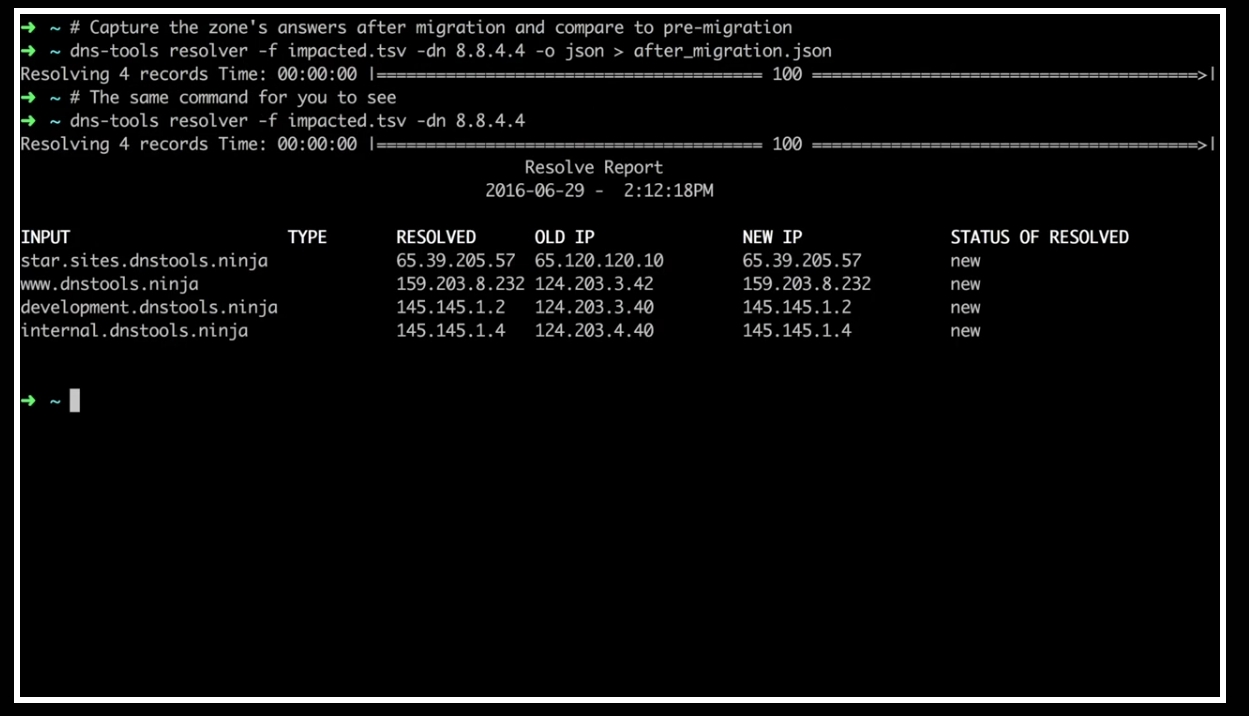
3. Verify
Before the migration, resolve these records against your DNS server to capture how they resolve pre-migration:
dns-tools resolver -db -o json > before_migration.json
After the migration has completed, check that all of your records resolve as expected post-migration:
dns-tools resolver -dn 4.4.4.4 -o json > after_migration.json
With this, you can compare the results pre-migration directly against the results post-migration:
diff before_migration.json after_migration.json
In this example, you can see that all the records you wanted to change the IP address on are correctly resolving to their ‘new’ IP address!
Congratulations! You just safely executed your data center migration in a measured and repeatable way.